0xc000000e eroare atunci când încearcă să boot Windows înseamnă că ai de a face corupt Boot Configuration Data. Boot Configuration Data este un magazin global pentru toate opțiunile și setările legate de boot pe computerele Windows mai noi.
Veți primi această eroare atunci când încercați să porniți dispozitivul și vi se va prezenta un ecran negru care vă oferă instrucțiuni despre cum să reparați computerul utilizând un disc de instalare sau o unitate de recuperare. Din păcate, având acea unitate de recuperare este singurul mod de a rezolva această problemă, deci ar trebui să puneți mâna pe una înainte de a începe. Dacă nu îl aveți, este destul de ușor să creați unul folosind instrumentul Rufus sau Windows Media Creation de pe orice alt PC sau laptop.

De asemenea, va trebui să porniți în BIOS pentru a schimba ordinea de pornire și a porni computerul de pe unitatea de recuperare în loc de pe hard disk. Pentru aceasta, urmați pașii următori:
- Introduceți setările BIOS sau UEFI apăsând tasta desemnată de producătorul plăcii de bază înainte de pornirea Windows. Această cheie este de obicei Esc, Ștergere, F2, F8, F10, F12 sau Backspace, în funcție de producător. Puteți efectua o căutare online despre cum să intrați în BIOS, urmată de modelul computerului.
- Odată ajuns în interior, navigați la Boot Utilizați instrucțiunile din BIOS pentru a vă schimba ordinea de boot și setați CD-ROM-ul sau portul USB ca primul dispozitiv, în funcție de faptul dacă unitatea de recuperare este un CD sau o unitate flash .
- Salvați setările și ieșiți.

Metoda 1: Reconstruiți datele de configurare de pornire
Pentru a face acest lucru, va trebui să porniți computerul de pe unitatea de recuperare. Dacă v-ați configurat BIOS-ul cu pașii de mai sus, puteți face acest lucru apăsând orice tastă odată ce promptul apare pe ecran. Odată ce computerul este pornit de pe unitatea de recuperare, urmați pașii următori pentru a reconstrui BCD:
- În caseta de dialog Configurare Windows , setați totul la valorile corespunzătoare, selectați limba și faceți clic
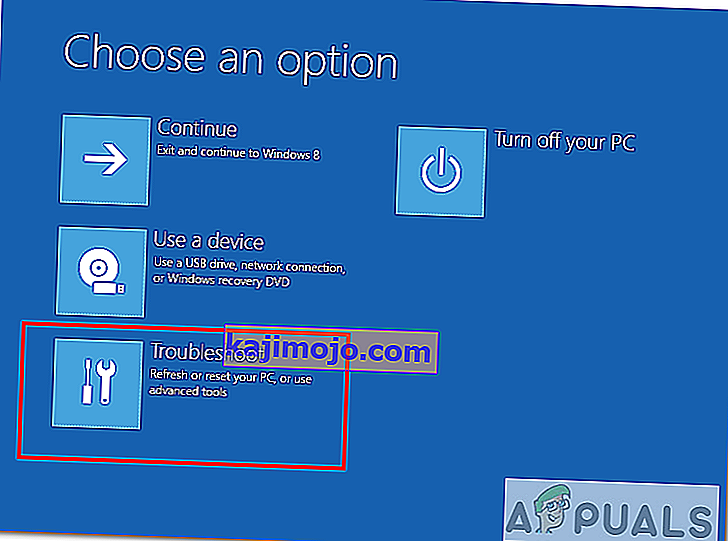
- În colțul din stânga jos, faceți clic pe Reparați computerul și alegeți Depanare din ecranul Alegeți o opțiune.
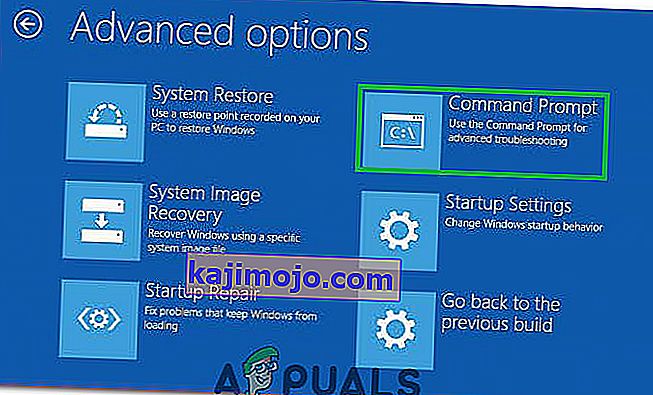
- În ecranul Depanare , faceți clic pe Opțiuni avansate și faceți clic pe Command Prompt.
- Când se deschide linia de comandă, tastați următoarele comenzi, apăsând Enter pe tastatură după fiecare dintre ele:
bootrec / scanos bootrec / fixmbr bootrec / fixboot bootrec / rebuildbcd
- Reporniți computerul și ar trebui să pornească bine, fără a face față din nou problemei.

Metoda 2: Reparați sistemul de operare cu unitatea de recuperare
Această metodă va repara sistemul dvs. de operare cu promptul de comandă al unității de recuperare și ar trebui să puteți porni în Windows fără a vă confrunta din nou cu problema. Porniți de pe unitatea de recuperare și urmați instrucțiunile de mai jos.
- Utilizați pașii de la 1 la 3 din metoda anterioară pentru a ajunge la Linia de comandă a unității de recuperare.
- Odată ajuns în linia de comandă, tastați comenzile de mai jos, urmate de un Enter pe tastatură pentru a le executa. StartRep.exe utilitate corectează valorile de mediu de boot și ar trebui să stabilească eroarea BCD. Rețineți că este posibil să trebuiască să repetați acest pas de mai multe ori în caz că eșuează.
cd x: \ sources \ recovery StartRep.exe
- Dacă pasul anterior de reparare a Windows-ului nu a ajutat, tastați bcdedit în linia de comandă, pentru a vedea valorile pentru Windows Boot Manager.
- Rețineți valorile pentru dispozitiv . Dacă sunt necunoscute , tastați următoarele comenzi, fiecare urmată de un Enter pentru a le executa. Rețineți că ar trebui să înlocuiți C: cu partiția unde este instalat sistemul dvs. de operare, dacă este necesar.
bcdedit / set {DEFAULT.EN_US} partiție dispozitiv = c: bcdedit / set {DEFAULT.EN_US} partiție osdevice = c: bcdedit / set {BOOTMGR.EN_US} partiție dispozitiv = c:- Când ați terminat promptul de comandă, închideți-l, scoateți unitatea de recuperare și reporniți sistemul. Nu ar trebui să aibă probleme la pornirea acum.
Singurul dezavantaj al acestor soluții este că necesită un impuls de recuperare, răbdare și nervi puternici. Cu toate acestea, dacă le urmați așa cum sunt descrise, ar trebui să remediați eroarea pe care ați primit-o și să continuați să utilizați dispozitivul ca înainte.
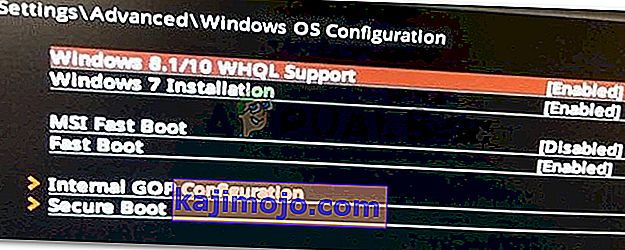
Metoda 3: Activați suportul Windows 10 WHQL în BIOS
Setarea de asistență WHQL pentru Windows 10 există în unele dintre OEM-uri. Are două funcții de bază: verifică driverele semnate în timpul procesului de boot și vă permite să activați suportul UEFI. Dacă utilizați Windows 10, trebuie să îl activați și apoi computerul dvs. poate porni normal. Cu toate acestea, dacă nu este selectat, computerul dvs. poate porni în eroarea 0xc000000e. Deci, puteți accesa BIOS-ul pentru a vedea dacă setarea de asistență WHQL pentru Windows 10 este activată. Dacă nu, activați-l pentru a încerca.
Trebuie să rețineți că setarea de asistență WHQL pentru Windows 10 nu este acceptată pe toate computerele. Dacă computerul nu îl are, puteți merge pentru a verifica dacă suportul UEFI este activat pe computer. Dacă nu, îl puteți activa pentru a vedea dacă dispare codul de eroare 0xc000000e. Pentru a o activa:
- Opriți computerul complet și lăsați-l să stea cel puțin câteva minute.
- După ce vă asigurați că a trecut timpul adecvat, porniți computerul înapoi și ar trebui să observați opțiunea „ Apăsați acest buton pentru a porni în modul Bios ”.
- Apăsați butonul pentru a porni în modul Bios.
- După ce porniți cu succes în modul Bios, verificați dacă există o setare Windows WHQL în Bios.
- Dacă este prezent, apăsați „Enter” pentru al selecta după ce ați evidențiat-o folosind tastele săgeată și selectați opțiunea „Enabled” pentru a o activa pe computer.
- Verificați dacă acest lucru rezolvă problema.

Dacă eroarea de pornire Windows 10 0xc000000e apare încă după activarea setării de asistență WHQL pentru Windows 10 sau suport UEFI, poate fi necesar să resetați configurația BIOS / UEFI de pe computer.
Metoda 4: Reconstruiți BCD prin Easy Recovery Essentials
Easy Recovery Essentials este o caracteristică de reparație automată a sistemului cu un singur clic, care încorporează repararea completă și reconstrucția BCD pentru a rezolva eroarea „0xc000000e”, chiar și în cazurile în care Windows nu va porni ca urmare a erorii.
Componenta de reparare automată a bootului EasyRE va aborda toate problemele legate de BCD, remediază BCD sau o recreează de la zero folosind codarea și calea corecte pentru partiția care refuză să se încarce corect. De asemenea, va marca discul ca fiind online pentru a se asigura că funcționează corect.
Easy Recovery Essentials este garantat pentru a remedia automat eroarea „0xc000000e” utilizând opțiunea de reparare automată încorporată. EasyRE este disponibil în prezent pentru Windows XP, Vista, 7, 8, 10 și poate fi descărcat și creat pe orice computer.
- Descărcați un alt computer pe care l-ați putea folosi pentru a crea un USB pe care îl vom folosi pentru a porni computerul.
- Descărcați Easy Recovery Essentials de aici.

- Ardeți imaginea.
- Porniți computerul de pe CD-ul Easy Recovery Essentials sau USB pe care l-ați creat.
- Once EasyRE is running, choose the “Automated Repair” option and click Continue.
- After EasyRE scans your computer’s drives, identify and select the drive letter for your Windows installation from the list, and then click on the Automated Repair Option to begin.
- Easy Recovery Essentials will start analyzing the selected drive for problems. EasyRE will test for and attempt to automatically correct errors with the disk, partition, bootsector, filesystem, bootloader, and registry. No intervention is required, as EasyRE’s repair is fully automated.
- Once the process is complete, EasyRE will report its findings. Click on the Restart button to reboot your PC and test the changes.

Method 5: Reset BIOS/UEFI Configuration
Some users said that their error 0xc000000e issue is solved by resetting the BIOS/UEFI configuration. So, you can consider trying this method to see whether this issue can be solved.
Step 1. Open BIOS Menu
To reset BIOS to default settings, you need to access the BIOS menu and find the Default Settings option first.
Windows 10 users can access advanced startup options Windows 10 and get into the BIOS menu. You can click Start -> Power, press and hold the Shift key, and click Restart button to reboot Windows into Windows Recovery Environment. Then click Troubleshoot -> Advanced Options -> UEFI Firmware Settings, and click Restart to enter into the BIOS settings screen.
Alternatively, you can also restart your computer normally and press the required key in the startup screen to boot into the BIOS settings window. The hotkey is varied from different computer manufacturers, and it could be F12, Del, Esc, F8, F2, etc.
Step 2. Find the Setup Defaults Option
The name and location of the “Setup Defaults” option may be different from various computers. It generally calls like: Load Default, Load Setup Defaults, Load Default Settings, Load BIOS Defaults, Load Optimal Defaults, etc.
Use the arrow keys on the computer keyboard to find the BIOS setup default option in the BIOS settings screen. You may find it in one of the BIOS tabs.
Step 3. Reset BIOS
After you find the Load Setup Defaults option, you can select it and press the Enter button to start resetting the BIOS to factory default settings in Windows 10.
At last, you can press F10 to save and exit BIOS. Your computer will automatically reboot. If you need to change BIOS settings again in the future, you can follow the same instructions to access BIOS again to change it.
Method 6: Mark Boot Disk As Online
It is possible in some cases, that the disk that you have connected to the computer or the USB that you are trying to boot from has been marked as offline by the computer. Some computers tend to prevent extra applications, hardware, and other things from being able to run as soon as the computer starts because it allows for more convenient and fast startup experience. Therefore, in this step, we will be marking the Disk as online.
You still need to use a bootable USB medium to do this job. We will show you a step-by-step guide here:
- After booting your computer from the bootable USB drive, you need to go to Next > Repair your computer. Then, you will enter WinRE.
- Go to Troubleshoot > Advanced options > Command Prompt.
- Make sure to properly enter your login credentials if you are asked by the computer.
- Type in the following command inside the command prompt to successfully launch the disk part utility on your computer.
diskpart
- Type in either one of the following commands in the next window to list the currently connected disk drives to your computer.
List Disk List Volume
- Once the disks have been listed, you need to identify the disk that contains the Windows operating system and the one that you want to mark as active.
- After identifying it, select the disk using the following command and replacing the alphabet with the driver letter of that disk.
select disk A Select Volume A (Replace A with the Drive Letter)
- After you have successfully selected the disk, you must mark the disk as online in order to initiate the recognization process of the disk at startup. Use the following commands to do that.
Online Disk Online Volume
- Type in the following command to successfully get out of the command prompt and restart your computer after that.
Exit
- Check to see if marking the Disk as online has fixed your issue.

Method 7: Check your data cables, BIOS and drivers
Unplug all HDD data cables, and then plug them again. Revert to the previous drivers and BIOS settings if they were changed, or use “Restore factory settings” option in the BIOS. Make sure to write down all current BIOS settings that were previously selected, just in case it is required to switch back. If the error is caused by a change of the SATA disk controller’s mode in the BIOS or firmware, the fix can be as simple as entering the BIOS and toggling the SATA controller’s “mode” setting. The exact instructions differ from one manufacturer to the other, but the options will resemble what is shown in the screenshots below.
To check the boot order, follow these steps:
- Restart the computer
- Press the necessary key to open the BIOS menu. This key depends on the computer manufacturer and computer model. This is usually listed on the first screen that appears on the monitor. It can be any of the following: Esc, Del, F2, F8, F10 or F12.
- If the screen shows multiple keys, find the key to open “BIOS”, “setup” or “BIOS menu”
- Attempt to toggle between all three (or more) modes until a combination that results in Windows booting successfully once more is found.
Method 8: Boot Windows In Safe Mode
If above solutions didn’t fix the problem, then Start Windows into safe mode. This will start your PC with minimum system requirements, will not load startup programs, add-ons etc. And allow performing troubleshooting steps to fix Boot Error 0xc000000e:
Before you enter the safe mode, you need to enter the Windows Recovery Environment (winRE). To do this, you will repeatedly turn your device OFF, then ON:
- Hold down the power button for 10 seconds to turn off your device.
- Press the power button again to turn on your device.
- On the first sign that Windows has started (for example, some devices show the manufacturer’s logo when restarting) hold down the power button for 10 seconds to turn off your device.
- Press the power button again to turn on your device.
- When Windows restarts, hold down the power button for 10 seconds to turn off your device.
- Press the power button again to turn on your device.
- Allow your device to fully restart and you should boot into the Windows Recovery Environment.
Now that you are in the Windows Recovery Environment, you will follow these steps to take you to safe mode:
- On the Choose an option, screen, select “Troubleshoot” and then “Advanced options.”

- Now click on “Startup Settings” and click on “Restart.”
- After your device restarts, you’ll see a list of options. Select option “4” from the list or press “F4” to enter Safe Mode.

Note: If you need to exit safe mode, simply restart your device, or:
- Press the “Windows logo key + R.”
- Type “msconfig” in the Run box and then select “OK”.

- Select the Boot tab and under Boot options, clear the Safe boot checkbox.

Method 9: Check your disk with CHKDSK utility
If the hard drive has its file integrity compromised, it is possible to use built-in Windows CHKDSK utility to scan the disk and fix the file system errors.
- Connect a USB drive that has been made bootable or insert the Windows Installation Disk on your computer.
- After connecting one of these, boot from that connected device.
- After booting your computer from the device, click on “Next” and then on the “Repair your Computer” option.
- On the next window, click on “Troubleshoot” and then on the “Advanced” Option.

- On the next screen, make sure to select the “CommandPrompt” option to successfully launch into the command prompt.
- Provide the login credentials of your account in order to boot inside the cmd.
- Inside the command prompt, type in the following command to successfully run the check disk utility on your computer.
chkdsk C: /f (Make sure to replace the "C" with the Drive letter of your partition).
- Confirm any on-screen prompts and wait for the scan to be fully completed.
- Check to see if the issue is fixed by performing this step.
Method 10: Disable fast startup Feature
If your computer has been set up to use the Fast Startup feature, you might be getting this error message on your screen because of doing so. The Fast Startup feature is known to malfunction with some operating systems and hardware combinations.
Basically, when enabled, the feature automatically sends some launch configurations to be stored in your RAM to allow for a faster startup as indicated by its name but this configuration data can sometimes be corrupted which can lead to this error on your computer. Therefore, in this step, we will be disabling it completely. For that:
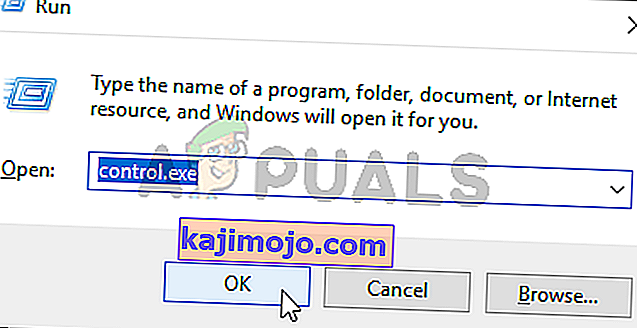
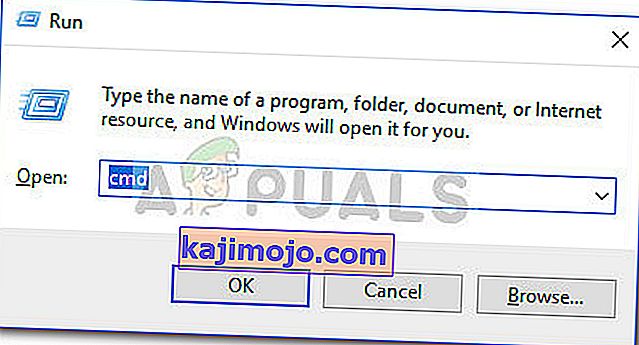
- Press “Windows” + “R” to open the Run prompt.
- Type in “Control Panel” and press “enter” to launch the classical Control Panel interface.
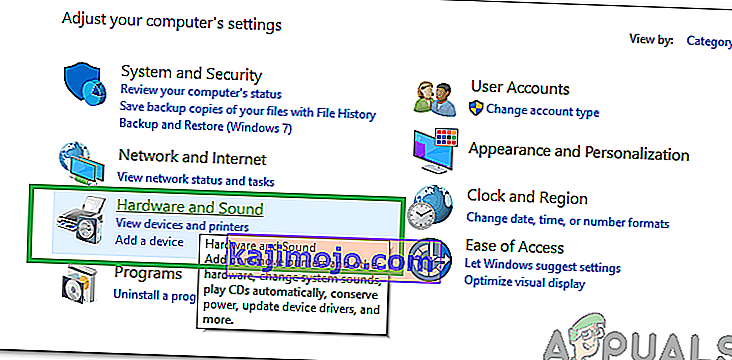
- Inside the control panel, click on the “Hardware and Sound” option and then select the “Power Options” button.
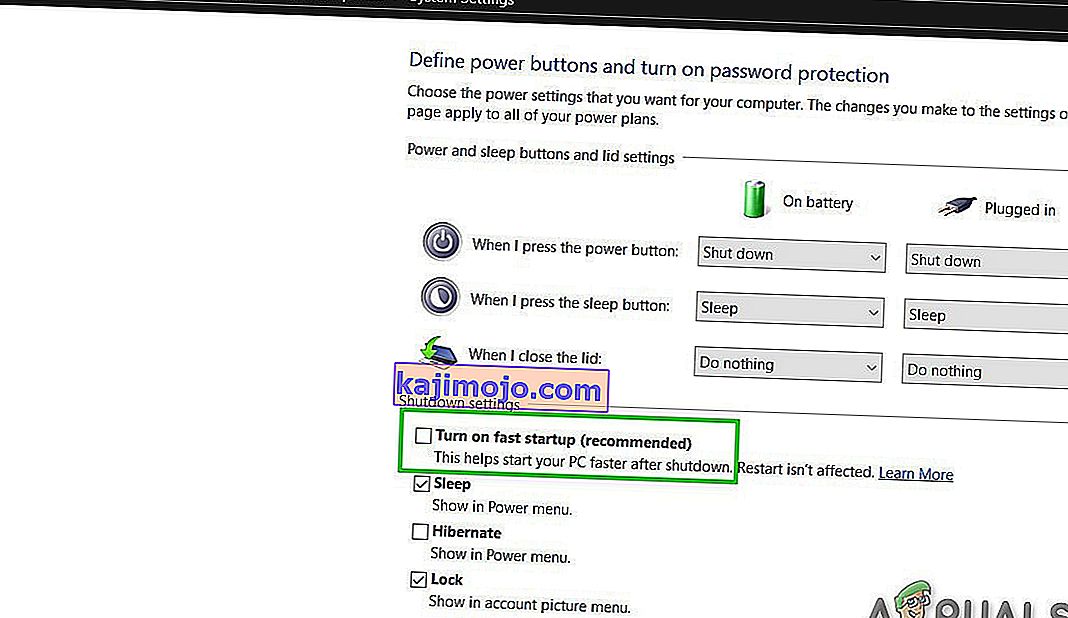
- Inside the power options, click on the “Choose what the power button does” from the left side.
- Click on the “Change Settings” option if the fast startup option is greyed out.
- Make sure to uncheck the “Turn on Fast Startup” option and save your changes.
- Closeout of the window and terminate any unnecessary applications.
- Click on the “Start Menu”, click on the “Power Options” and select “Shutdown” from the list.
- This option should completely power down your computer and after performing a complete shutdown, wait for some minutes before turning your computer back on.
- After the computer turns back on, check to see if the error message is fixed.
Note: This solution can only be applied if you are able to sometimes boot up your computer normally and are only encountering this error momentarily.


Method 11: Repair Corrupted System Files
It also possible in some situations that certain system files might have been corrupted due to a storage failure or due to some other reason. Therefore, in this step, we will be performing a complete repair of the corrupted system files and then we will check to see if doing so fixes this issue. For that:
- Press “Windows” + “R” to open the Run prompt.
- Type in “cmd” and then press “Shift” + “Ctrl” + “Enter” to launch the command prompt with admin privileges.
- Type in the following commands one by one and press “Enter” after each to successfully run an SFC scan and a DISM Scan on your computer.
DISM /Online /Cleanup-Image /RestoreHealth sfc /scannow
- Restart your computer completely once these scans are completed.
- Check to see if by performing these scans, you were able to fix this issue on your computer.

Method 12: Run Windows Startup Repair
Startup Repair is capable of diagnosing and fixing the found issues. For example, it can automatically scan system files, registry settings, configuration settings, etc. and try to fix the problem on its own. Startup Repair is especially useful when your computer is unbootable. Since your computer fails to boot, Windows can boot into WinRE automatically. While, if it doesn’t appear, you can interrupt the boot process three times in a row, and then the WinRE screen appears. Alternatively, if you have a bootable USB medium, you can also set your computer to boot from it and go to Repair your computer to enter WinRE.
After you have successfully booted into the Windows Recovery Environment, click on the “Troubleshoot” option, and from there, select the “Advanced Options” screen. Inside the advanced options, select the “StartupRepair” button to successfully initiate the Startup Repairing process. Windows will begin to diagnose your computer automatically. When the process ends, your computer will restart automatically. You can wait to see whether it can boot successfully.

Soluție: asigurați-vă că nu sunt conectate dispozitive suplimentare înainte de a intra în linia de comandă sau de reparație la pornire, cel mai bine este să încercați o altă repornire cu cel mai mic număr de dispozitive și unități externe conectate la computer. Acest lucru vă va asigura că nimic din cele adăugate recent la computer nu cauzează această problemă. Cel mai bine ar fi să deconectați orice unitate USB recentă, CD-uri, DVD-uri etc. Aceasta include și un cititor de carduri de memorie. Asigurați-vă că toate unitățile externe și cheile USB sau unitățile USB jump au fost deconectate, apoi încercați din nou.